

Case study courtesy of Dentsply Sirona.
In the following case study, Dr. Meena Barsoum, shares how Primeprint has improved his digital workflow to produce a 3D-printed splint with Primescan AC and Primeprint Solution to create a removable night guard for his patient that will help minimize wear on his dentition.
Case Description

noctural bruxism Usage (middle images): Finalizing the object to be printed After (bottom): Detachable 3D-printed splint with Primeprint Splint material
A male patient 34 years old presented himself to my practice, with symptoms of nocturnal bruxism and expressed experiencing muscle pain and soreness. We decided that wearing a removable mouth guard at night would minimize wear on his dentition.
We started with a full upper and lower jaw scan of the patient using Primescan AC and designed the splint with the Splint module in inLab SW 22. The scan was seamlessly integrated into inLab CAM 22 software, where the splint was then printed and processed using Primeprint Solution.
We captured the jaw relation bite using a leaf gauge to check if he was in a fully seated condylar position and to create adequate space for the future appliance. In CEREC SW, I selected ‘Splint’ as an indication. The software then automatically opened the Splint module to finalize the design. Then it was sent to the CAM software to optimize the positioning and supports for successful printing. We did all of this in just one click! Once the splint was finished in the Primeprint with Primeprint Splint material, my assistant finalized the appliance by transferring the Primeprint Box to the Post Processing Unit. After giving the supports a quick polish using a carbide bur (that left a nice and smooth finish), the appliance was ready to be delivered.
Before Primeprint, I used several other printers, but their post-processing gave me cause for concern. It was quite messy, and I would often wonder if the appliance was safe for intraoral use. The Primeprint Post Processing Solution gives me confidence that the appliance has been thoroughly cleaned and cured as a medical device for use. I also found that it was easier to finish and polish with this acrylic— did not see any warping and distortion with temperature changes that I usually would with the competitor material.
It took us around 40 minutes to print and 45 minutes to post process, while the treatment itself was done in just under 2 hours: 10 minutes to scan and design, and one and a half hours to manufacture.
 Fig: 1: Initial oral situation. The patient presented with symptoms of nocturnal bruxism and should get a removable mouth guard
 Fig. 2: Scanning with Primescan after selecting “Splint” as an option in the CEREC Software

 Fig 4: The model in the inLab CAD Software

 Fig 7: Finalizing the object to be printed


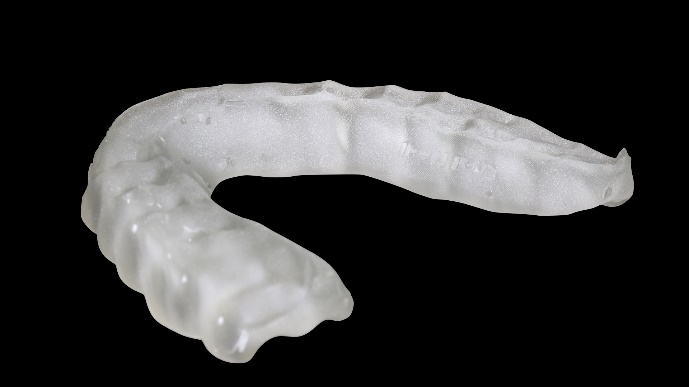
 Fig 11: The 3D-printed splint after removal of the supports, cleaned and cured as a medical device for use
Discussion
 Dr. Meena Barsoum
Dental devices like Primeprint Solution and Primescan AC can no longer be ignored or underestimated— they are dramatically changing our industry and setting a new standard for how high-quality dentistry should be done. It is simple, predictable, and automated enough for anyone to use—from seasoned users to brand-new team members. Patients regularly tell me how amazed they are by the speed and comfort of the appliances; its precision and snug, retentive fit create a premium impression. This particular patient experienced muscle pain and soreness. Primeprint allowed me to manufacture the appliance in 3 hours, so that he could leave my practice able to use it that very night.

You must be logged in to post a comment.